You can customize your event’s descriptions to include a detailed schedule of activities, the guest speakers attending the event, or a list of event sponsors.
Schedule:
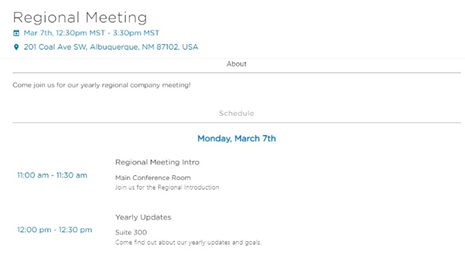
Allows you to customize your event to show when certain activities will occur. Best used when your event has multiple activities at different times.
Step 1: From the “Detail Section” of the event creation, click on the “Blue Plus Symbol” next to the “About” in the “Description Tabs”. Next, select “Schedule”.


Step 2: Add in the name of the activity and the timeframe it will occur.
Step 3: Click on “Add” when you have entered all the necessary fields.
Step 4: Review and save your scheduled activities before moving to the next step. Click “Next” to continue creating the event.

Speakers:
You can create a detailed list of guest speakers that are attending your event.
Step 1: From the “Detail Section” of the event creation, click on the “Blue Plus Symbol” next to the “About” in the “Description Tabs”. Next, select “Speakers”.


Step 2: Enter your guest speaker’s information. You can also include an image that will be visible from the event. Once all necessary information is entered, click on “Add”.
Step 3: Review your speaker information before moving on to the next step. Click “Next” to continue creating the event.

What your customers will see when viewing the event:

Sponsors:
Create a list of all your sponsors that helped make this event possible.
Step 1: From the “Detail Section” of the event creation, click on the “Blue Plus Symbol” next to the “About” in the “Description Tabs”. Next, select “Sponsors”.


Step 2: Next, input all of your sponsors information. You can also include an image of your sponsors logo that will be visible to customers purchasing the event. Click on “Add” when finished.


What your customers will see when viewing the event:
